

If you had root on the ASUS Transformer Prime TF201 before updating to Jellybean 4.1.1 you will realise that you end up with a partial root after upgrading. However the good news is that you can restore full root access on your ASUS Transformer Prime TF201 quite easily.
Note: i did have a root backup created by OTA Root Keeper, however trying to restore that after upgrading was not successful. I’m not sure if trying to do that played a part in the partial root i had after upgrading or not.
First on your Transformer Prime load the settings app, go to Development options and enable USB debugging, then connect your Transformer Prime to the PC with the USB cable. If you are asked to install drivers download the drivers here.
The easy way to re-root your Transformer Prime TF201 on Android Jellybean 4.1.1
Since writing this tutorial many months ago, a newer, easier and automated root method has been discovered for the Asus Transformer Prime on Jellybean 4.1.1 and various other devices. You do not have to have an existing partial root now either, you can root a completely stock Transformer Prime.
To root your Transformer Prime, simply download Motochopper, then open the run.bat if you are on Windows. You will be informed that you need the usb drivers installed, and that you must have USB debugging enabled as i mentioned above.
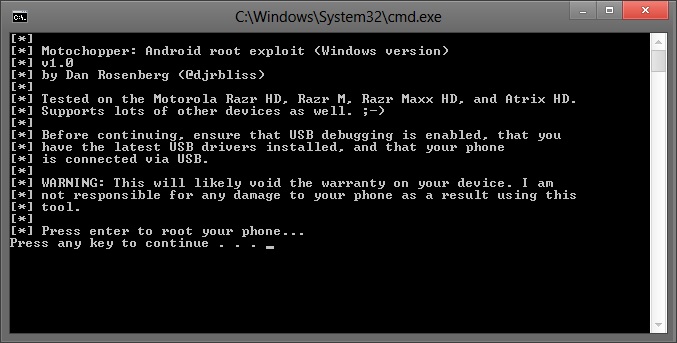
Once you have done this press any key to continue and you should have a fully rooted transformer prime in around a minutes time.
The older way to re-root your Transformer Prime on Jellybean 4.1.1
To do this you will need the Android SDK installed, after installing you will need to open a command prompt window and navigate to the platform tools folder.
As i installed the Android SDK to C:\Apps for me this would be
cd C:\Apps\android-sdk-windows\platform-tools

Now download sufiles.zip and unzip them to your C:\ drive in a folder called “sufules”

Run the following commands in the command prompt window to push the superuser files to your Transformer Prime
adb push C:\sufiles\su /data/local/tmp/
adb push C:\sufiles\Superuser.apk /data/local/tmp/
adb push C:\sufiles\busybox /data/local/tmp/
Now type:
adb shell
You should now be in a shell / terminal prompt on your device, type in the following commands
chmod 6755 /data/local/tmp/su
chmod 755 /data/local/tmp/busybox
chmod 644 /data/local/tmp/Superuser.apksysrw
cp /data/local/tmp/su /system/bin
cp /data/local/tmp/busybox /system/bin
cp /data/local/tmp/su /system/xbin
cp /data/local/tmp/busybox /system/xbin
cp /data/local/tmp/Superuser.apk /system/app/reboot
After your Transformer Prime re starts you should find you can grant applications root / super user access when the app request it.

Asus Transformer Prime TF201 after the Jellybean 4.1.1 update:

Hopefully this will allow newbies and experienced users alike to re gain root on the Transformer Prime TF201 After Jellybean 4.1.1 Update, i was able to do so perfectly anyway.
47 Comments
I just unlocked my TF Prime t201 today and wanted to root while on JB for the first time. I followed your steps. When I get it the sysrw part on command prompt it states its “not found”. Am I missing something?
I have installed the drivers for the tablet. Tablet is in Debugging mode.
Do you have any recommendations?
Thanks!
– Brian
Hi Brian, unfortunately this method will only work if you were already rooted when on Ice Cream Sandwich and upgraded to Jelly Bean and lost root.
The only thing i can think of at the moment is to downgrade your prime back to ICS, root it, then upgrade to Jelly Bean and root following my instructions above.
This can be a risky procedure however, if you are interested in doing that have a look at this thread over on XDA: http://forum.xda-developers.com/showthread.php?t=1622628 it should allow the original Transformer and Transformer Prime to be downgraded.
Good luck!
I came across this post after having updated to JB without having first rooted.
Does anyone know the risks of downgrading back to ICS as described in this post
http://forum.xda-developers.com/showthread.php?t=1622628
from JB Rom?
You could brick your tablet if something goes wrong, read the warnings on the post and decide if its something you feel you want to do.
How do I know if i am partially rooted?
If you were rooted before upgrading you should have. Some apps like Titanium backup will think they have root, although will not function correctly.
Basically if you don’t will not be able to complete this tutorial, however you will do no damage trying to.
When I type sysrw this happens:
shell@android:/ $ sysrw
sysrw
/system/bin/sh: sysrw: not found
i have a problem with the sysrw it gives an error message not found. What is the problem here?
I lost root as well, however like a few others mentioned, remounting the filesystem doesn’t work for me… no matter how I tried…
followed your instructions to the letter,
shell@android:/ $ sysrw
sysrw
/system/bin/sh: sysrw: not found
as other have had this issue. any ideas?
I get the same issue with the sysrw.
Even reboot command doesn’t work.
I did try the copy commands it the ones with xbin says the file already exists. But my OS is still telling me I don’t have root.
Titanium Backup still fails for Root access.
Any chance anyone has figured out a way to fix the sysrw error without rolling back? I get ‘not found’ errors on these lines:
sysrw
cp /data/local/tmp/su /system/bin
cp /data/local/tmp/busybox /system/bin
cp /data/local/tmp/su /system/xbin
cp /data/local/tmp/busybox /system/xbin
cp /data/local/tmp/Superuser.apk /system/app/
And an ‘Operation not valid’ error on the reboot command.
I did have my tablet rooted before the Jelly Bean update so theoretically this should work. Could it possibly be a problem if we don’t have the exact same sdk packages installed as you? Could you let us know which ones you have installed so we can check?
Thanks so much! I really appreciate you taking the time to make this tutorial because everything else I’ve tried has been very confusing and hasn’t worked!
If you have issue with the command sysrw
You can try this : http://forum.xda-developers.com/showthread.php?t=1911261
replace by the command :
mount -o remount,rw /system
It didn’t worked for me. So I searched again and find this : http://forum.xda-developers.com/showthread.php?t=1929189
You need to break the bootloader first if you haven’t do that before on your phone.
If you are on Mac as me, you also need to follow manualy the steps in the .bat file downloaded before. And also you need fastboot for mac here : http://www.mediafire.com/?0nwuina1ydi
Long way… but it works fine.
Have a question I have just received my Prime back from SQUARETRADE warranty They changed out my Motherboard so now I am of course NO Root Now New board is LOCKED bootloader and ICS 4.03 9.4.2.21 Tablet is ready for update waiting. How should I proceed to get root and JB..
I believe you need to downgrade to an earlier version of ICS if you wish to root as i dont believe a root method has been found for ICS 4.03 9.4.2.21
This can be done by following the guide here: http://forum.xda-developers.com/showthread.php?t=1622628
After you have downgraded you can gain root with the tool here: http://forum.xda-developers.com/showthread.php?p=21009605
Next install OTA root keeper from the Android market: https://play.google.com/store/apps/details?id=org.projectvoodoo.otarootkeeper&hl=en
Load the app and backup your root.
Finally upgrade to jellybean and you should be able to re gain root by following my original blog post.
I rooted from the start so have never had to downgrade, presuming you manage to downgrade i see no reason why you cant root, backup your root and update like i did.
Good luck i hope you manage to do so.
I was able to root with [ROOT][TOOL]Debugfs automated root [09/18/2012] http://forum.xda-developers.com/showthread.php?t=1706588
then voodoo root otakeeper upgraded to JB and restored root.. worked with our a downgrade.
Thanks for you idea.
Glad it all worked without the risk of a downgrade! Enjoy your rooted prime 🙂
These instructions worked great for me, thanks! I had lost root after upgrade to 4.1.1 in my TF201, but still had partial root.
I had to `adb push` to /sdcard/ instead of /data/local/tmp/ as I was getting a permission denied pushing to /data/local/tmp/ because I couldn’t get adb to run as root (`adb root` complained about not working on production devices).
Once I logged in with `adb shell`, I had to run `su` in order to be able to see anything in the `/data` or `/system` directories.
As well, I was getting the `not found` error with the `sysrw` command, so I instead used `mount -o remount,rw /system`
After that, I found that the `cp` command did not exist (somehow), so I tried `mv` to move the files from /sdcard to /system/bin/, but got a `Cross-device file` error. I worked around this by using `cat` to “copy” the files from one place to another, which (surprisingly) worked: `cat /sdcard/su > /system/bin/su`.
Lastly, I ran `chmod` on the files in their final location in the `/system/` directory. After a `reboot`, Superuser is once again working correctly.
Thanks again!
Thanks for taking the time to reply with your experiences, everybody appears to be managing in slightly different ways, hopefully your information might be useful to someone else too!
Thanks Matt for a great post.
I’m getting a permission denied error when I try to push the files.
Any ideas?
hi,
i broke my voodoo partial root so i couldnt mount system etc..
what helped me was the following:
cd /system/usr/we-need-root
./su-backup
mount -o rw,remount /system
cp su-backup /system/xbin/su
and then your commands (but instead sysrw: mount -o rw,remount /system), but the important line was ./su-backup to get the partial root (# in the shell) back
adb push C:\sufiles\su /data/local/tmp/
adb push C:\sufiles\Superuser.apk /data/local/tmp/
adb push C:\sufiles\busybox /data/local/tmp/
adb shell
chmod 6755 /data/local/tmp/su
chmod 755 /data/local/tmp/busybox
chmod 644 /data/local/tmp/Superuser.apk
mount -o rw,remount /system
cp /data/local/tmp/su /system/bin
cp /data/local/tmp/busybox /system/bin
cp /data/local/tmp/su /system/xbin
cp /data/local/tmp/busybox /system/xbin
cp /data/local/tmp/Superuser.apk /system/app/
reboot
Pingback: Finally! New root method for TF201- one click! (also works on 300 and 700)
Ive updated the guide with the new one click root method that was recently discovered, hopefully this will work fine for most people.
Matt, I just wanted to thank you for your post about motochopper !!! I was desperate to find a way to get my root back since I updated my transformer to JB.. I lost my root and my bootloader was locked so I was kinda screwed but man motochopper works like a charm I have root again !!
Thank you so much, you’re the man !! Fuckin’ makes my day 😀
Can I root using the new root method with moto chopper without unlocking the boot loader? Or do I need to go to the Asus website and unlock it. I have complete stock. Never unlocked or rooted. Its time to get a better rom. Stock is slow as hell
You can root with motochopper without unlocking the boot loader, however to flash a custom rom I believe you will need to unlock the bootloader using the tool on the Asus website.
Would you recommend unlocking the boot loader and then rooting or rooting and then unlocking boot loader? Which should be first? Thanks for answering my previous question
In all honestly i don’t think it really matters. Until recently anyone who had updated had to unlock first, then root.
Personally I would root first, remove some the the ASUS junk that comes with the tablet then see if you still feel you need to flash a custom rom.
Unfortunately with our primes the development scene is not that active and most of the 4.2 roms have some sort of bugs with them. Personally i’m holding out on unlocking the bootloader as once you do that you will no longer get official updates from ASUS.
My plan personally is wait and see if ASUS give us Android 5.0 or not, basically once we get no more official updates ill just unlock then. I like been on the latest and greatest, however I also like a stable device with no bugs so i’m a bit stuck at the moment what I want to do with mine.
The tf101 ended at ICS I believe. So I think they will stop the prime at 4.1 or 4.2. After all it will be at least year and half old tablet until key lime pie comes out. Doubt Asus would bother but we never know
dude……………………..thank u so much for this, after i upgrade to jelly bean i lose my root acess since then all i have heard is that there is no root access for asus prime unless you unlock the bootloader……………today i was looking online for any update regarding how to root the Prime and i found your link, mannnnnnn i was excited……..i went and follow the instructions which is very simple and booom my prime is rooted………and my bootloader is still locked. God Bless u Dude……..thank u very much Genius!!!!
MaN, This Is Freaking Awesome Dude…….Thanks A Million For This Wonderful Method To Rooted My Prime After Jelly Bean 4.1.1 Took Away My Root Access……Every Webs I Check Said The Same ” Its ImpossiblE To Root Asus Prime Jelly Bean At This Time Or U Have T Unlocked The BootLoader To Root……And All That Changed After I Found Your Link And Instructions It Takes 1Click & Boom My Prime Was Rooted…..Thank U A Million For This Hard Work Of Yours……God Bless And Keep Up The Good Work Bro….We NeeD Ppl Like U Around!!! ThankS Again Bro…..
Lost root when I upgraded my wife’s tablet to 4.1.1 and didn’t think/know that OTA Rootkeeper needed a reinstall to help keep root (plus having to manually upgrade from zip I think may have had something to do with it too). Your article helped, thanks!
Pingback: Xperia Tablet S: Root nun auch für Jelly-Bean-Update verfügbar | TabletCommunity.de
I have run motochopper three times, all three ending with “success”, yet I do not have “root permission granted” in Rootkeeper, nor can I update the binaries in Superuser. Any suggestions?
More specifically..when I run su binary updater, it fails to gain root access.
Pingback: [ROOT][HOW-TO][XPERIA TABLET S] How to root your Xperia Tablet S running Jellybean 4.1.1 - Android Forums
Thanks a lot! Rooting my Sony Tablet S has been a pain-in-the-ass until now, but finally I have root access! 😀
it is used for lava iris455
I get a message saying
*daemon not running. starting on port 5037*
*daemon started succesfully*
then I get nothing and it just sits there
Cancel! I docked it to the keyboard so my desktop would recognize the tablet properly and then everything worked fine.
I never rooted my tr201 and I’m trying to find a way to root it on 4.1.1
The Motochopper doesn’t work, I tried everything and can’t find the way, could you please help me?
Thank you
bump. I too would love to know if its still possible if one never rooted before 4.1.1
Yes Motochopper should work perfectly fine, if not unlock the tablet and flash a custom rom as per the instructions here: http://matthill.me.uk/android/transformer-prime-tf201-jellybean-nvflash/
Asus are not providing updates to the tablet anymore and you get a much better experience with the Cyanogenmod rom. Multiple users on the Transformer prime has been really nice, the tablet has got a lot more use since it’s been able to do that 🙂
Pingback: Unlock Backup Blobs and Enable nvFlash on Asus Transformer Prime TF201
how do i know if its rooted
Apps what require SuperUser rights will be able to request them (you will get a pop up on screen)
You can also download the Terminal Emulator app, type SU and you should be prompted to grant Terminal Emulator super user rights.
Hi, It seemed to go ok but Super SU gives me the ‘There is no SU Binary installes’ message when I try to open it. Any ideas? Robert